Organize source data by figure
Trace figure elements to their sources and match companion images by filename. Review the complete originals, arrange columns and headings, then export the source-data document.
Practice with built-in examples without signing in. Register for free figure tools and an eligible full-feature trial of up to one month, subject to account and device history. After online verification, use your authorized features offline on this computer for 30 days.
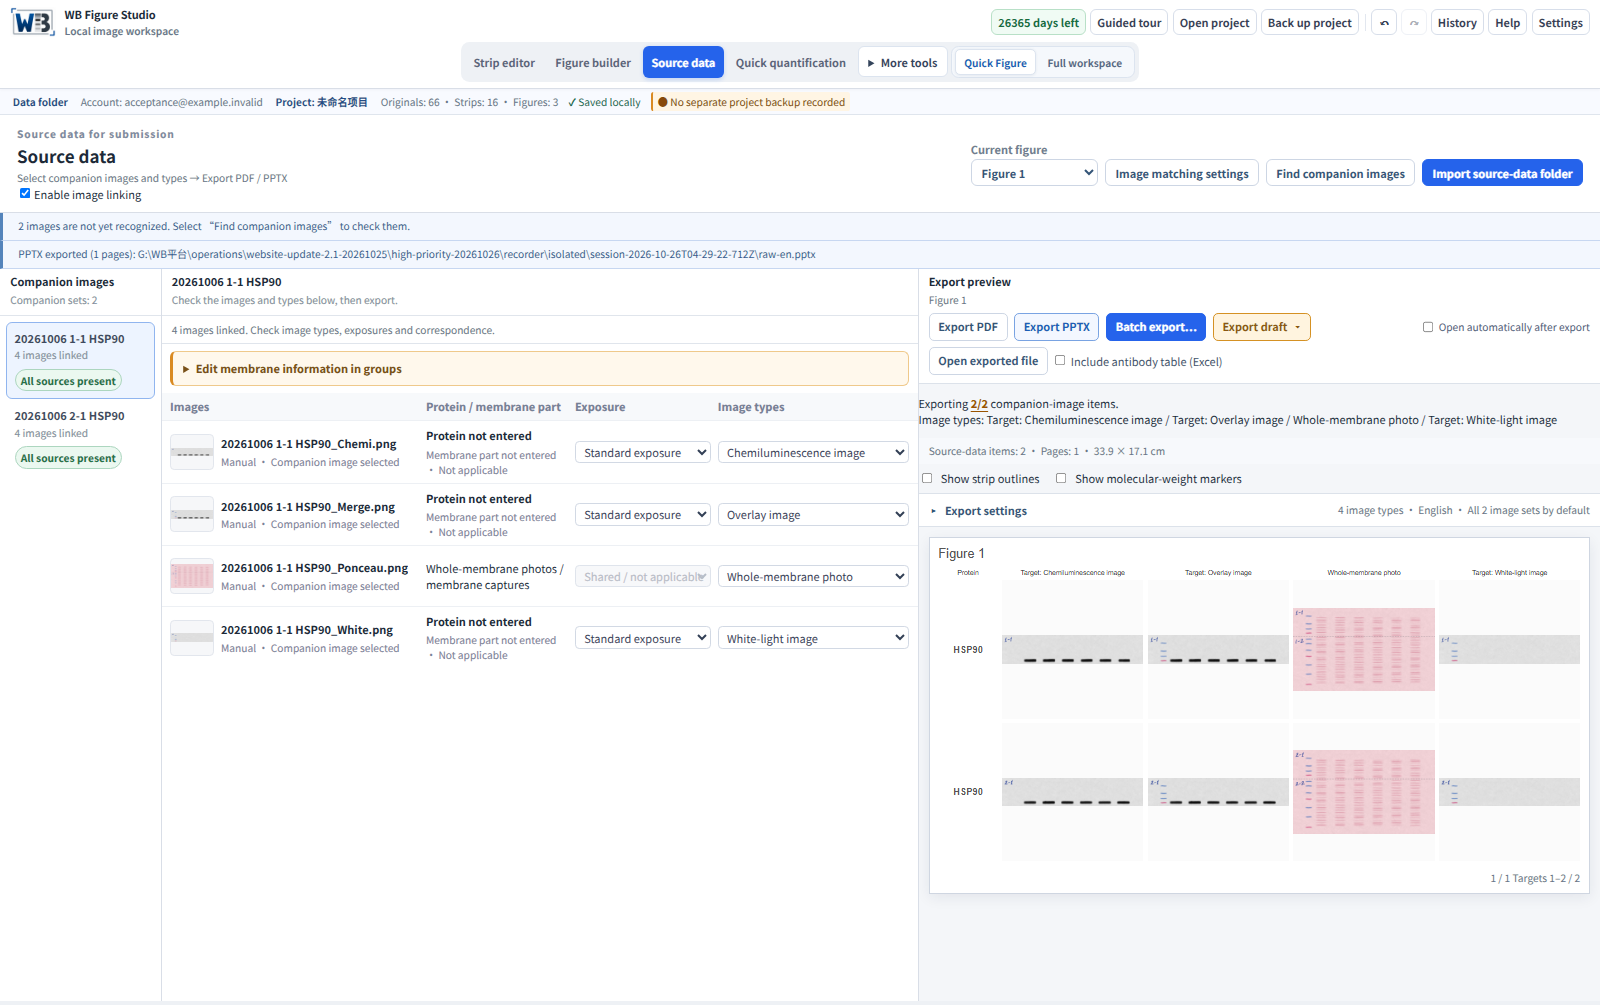
From a figure to complete original images
Collect the figure’s originals
Trace placed strips to their sources and collect complete target and control images.
Match companion filenames
Use Set companions and remember format to assign image types and default pages, preview a reusable format, or save only the current group.
Arrange your columns
Choose image columns, drag them into order and edit the headings to fit your submission.
Paginate PDF and PowerPoint
Paginate multiple source-image sets automatically. Use PDF for reading or PPTX for further layout edits.
Complete originals, arranged for your needs
Keep complete target and control originals connected to the figure. Arrange the image columns, then export a readable PDF or an editable PowerPoint file.
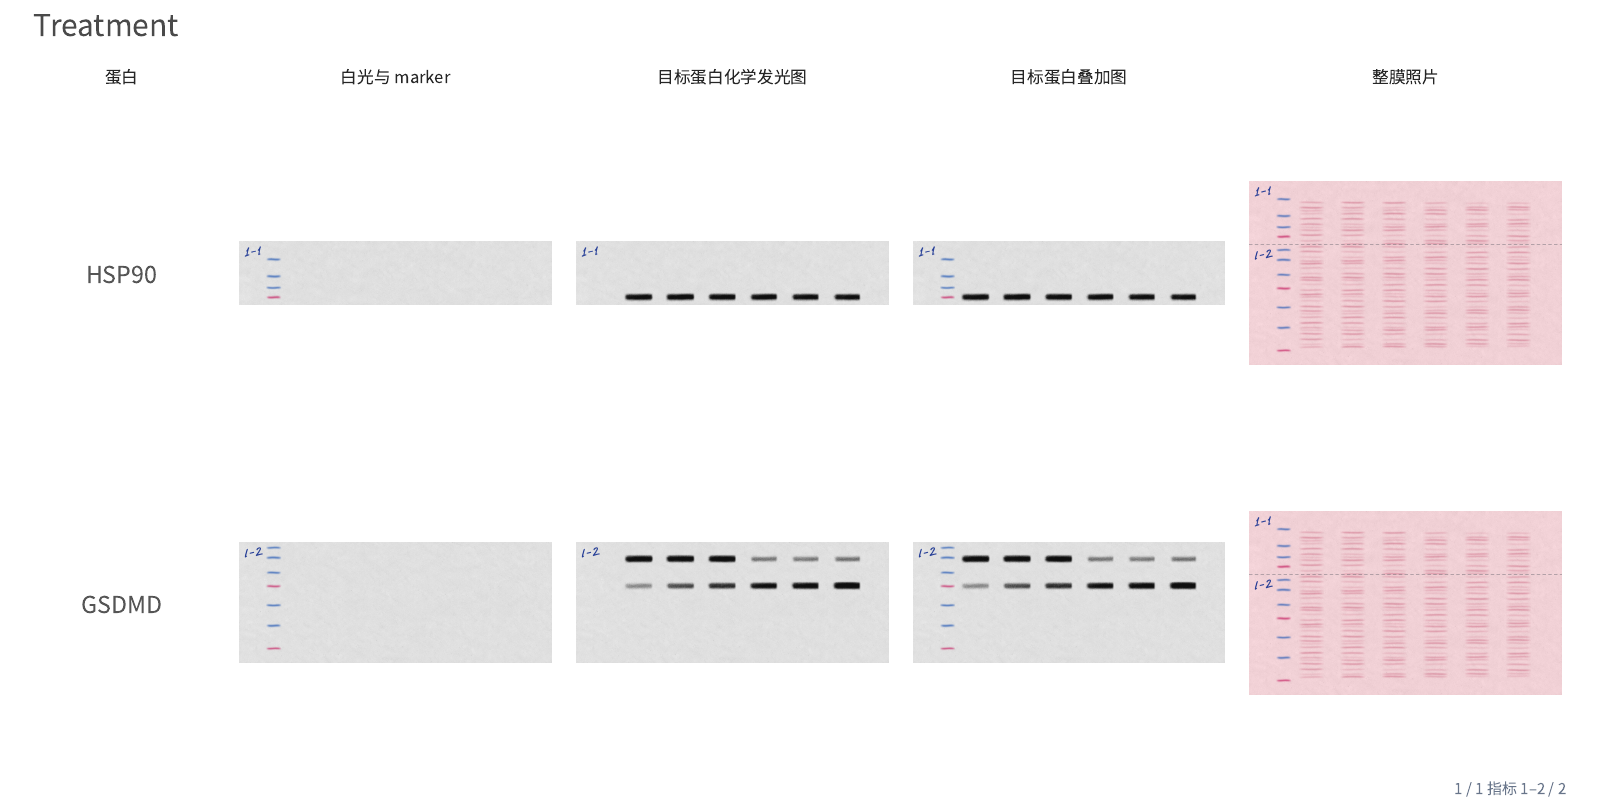
View the two source pieces from one membrane
One membrane, cut into two pieces
The six samples share one membrane. After cutting along the dashed line, upper piece 1-1 is used for HSP90 at 90 kDa and lower piece 1-2 for GSDMD at 53/30 kDa. Lane order remains the same in both pieces.
Each piece has its own companion set. Keep both sets in one folder, import them together, then review each set separately.
Get started with this feature
Start from the current figure
Check the strips and labels in the figure, then open Source data to inspect the target and control origins it uses.
Review the companion images
Inspect chemi, white-light, merged and membrane images for each set. Verify the membrane, samples and exposure, save any manual links and check the result before continuing.
Arrange the columns
Drag columns into the order you need and save the headings. Check that the complete originals, protein names and columns correspond.
Export and reopen the files
Export the reviewed PDF/PPTX when the links have been checked. A marked draft is available while review remains open. Reopen the files to inspect page count, originals, labels and pagination.
Frequently asked questions
Does the document contain crops or complete originals?
The export contains the complete selected source images. Companion images appear in their columns according to the reviewed links. Strip crop coordinates remain in the software project so you can revisit their origins.
How does a reviewed export differ from a draft?
A final export requires complete, readable selected image columns. Review source identities and companion relationships before exporting. Supply missing originals, remove an affected column or explicitly choose a marked draft for further checking.
Should I review automatically suggested companion images?
Yes. Filenames and folders help locate candidates, but you still need to verify membranes, exposure and experimental correspondence. Choose the actual material when there are multiple candidates. Manual links are retained in the project.
What happens when there are many originals?
PDF and PPTX paginate automatically when the content exceeds the supported page dimensions. After export, check the headings, originals and image order on each page.
Is a PDF/PPTX export a complete project backup?
PDF/PPTX documents present source data for delivery. To restore editing, saved strips and relationships inside the app, also save a .wbfig package with Back up project.